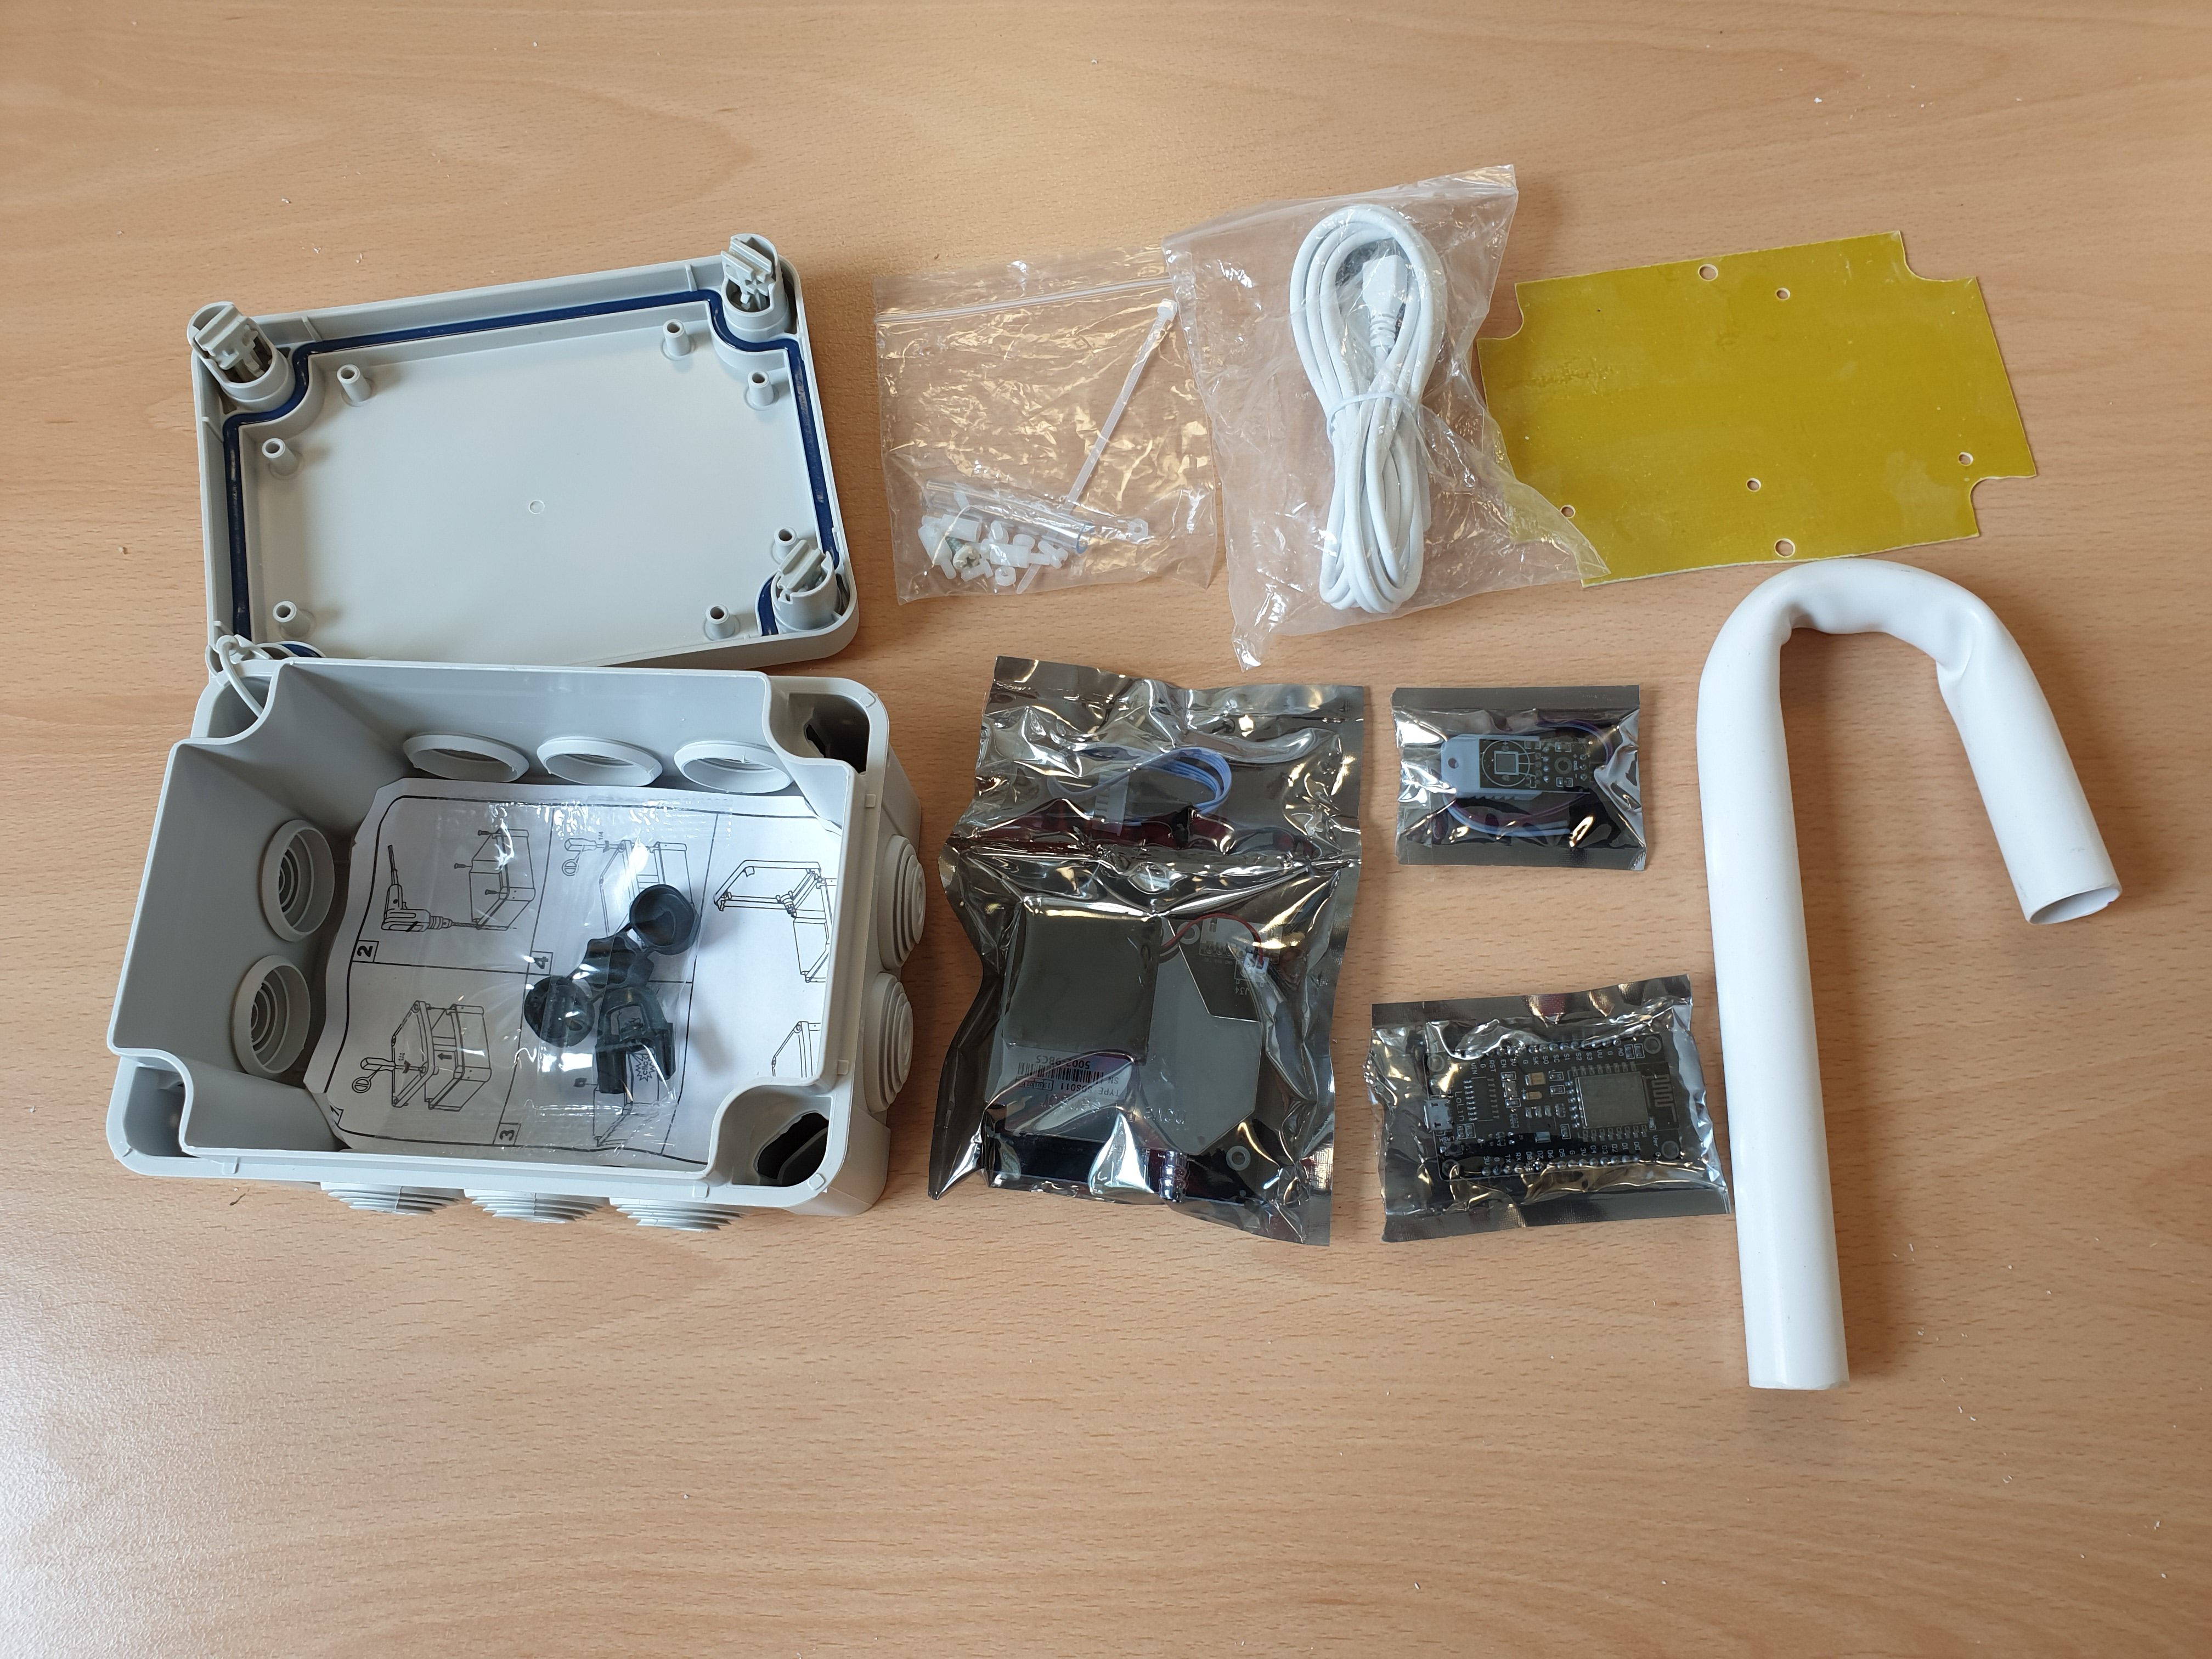
The sensors we build give us a valuable insight into the quality of the air we breathe. they are based on the design from luftdaten placing it in a box instead of a drainage pipe.
The sensor is based around a NodeMCU, which is a WiFi enabled micro-controller, and uses a SDS011 laser based particulate sensor, and a temperature and humidity sensor to collect data on air quality.
Build your sensor
The sensor kits are put together by 57North Hacklab, and regular workshops are held to build the sensor kits. This is a beginner workshop with no soldering or coding suitable for all ages over 12. At the end of the workshop you will take home your sensor to install it at your home and record the particulate pollution in your area.
If you are interested contact us and we will find you a place on one of our workshops. We only charge the cost price of the sensor which is £30, as long as you promise to connect it up and give the world data.
Install your sensor
Once you have your sensor home you will need to:
- Mount it outside and provide power for it.
- Connect it to your WiFi Network.
Mounting the sensor
Find a location outside house which will be in range of your WiFi network, and be able supply power to the sensor, this can be near a window or vent.
If it is on a wall where people pass by you may want to make sure it is out of reach.
It can be mounted by screwing it to the walls using through the corners, of you can just hang it with cable ties.
Connecting to your WiFi network
Once you power it on, it will create a new WiFi network with the name:
fienstaubsensor-XXXXXXX
The XXXXXXX will be a number which is your device ID, you should take a note of this if you have not already. Use your mobile or computer to connect to this WiFi network, when connected put the address below in the address bar of your web browser:
You will see a configuration page where you select your home WiFi and type in the password, then click:
Save and restart
The you should now connect to your own home WiFi then go to the Medavi sensor page and check to see if your sensor is active by searching for the ID Number, you should see two or more links with your ID, one for the SDS011 Particulate monitor and one for the DHT22 or BME280 temp and humidity sensor. if the links on the Medavi page are red, it means it has not been added to luftdaten’s map. Click on the links with your ID number, and check you are getting reading from te sensors, it will show you graphs f the readings..
Register your sensor
luftdaten.info
If you have the the sensor reading to Medavi. you can add it to Luftdaten’s map at:
Register an account and follow the instructions to register the device to your location.
opensensemap.org
First you resister an account, and take take a note of the senseBox ID of the :
Now add a configuration option to your sensor you can find out how to do that at Register a Luftdaten.info Particulate Matter Sensor on the openSenseMap
Troubleshooting
If you’ve been having problems with your sensor there are a number of options, we have a Frequently Asked Questions which we are working on and will be up soon.
We will help to get your sensor working, alas we are all volunteers but we will try to be as responsive as possible.
Access the data
All data collected by the sensors is available as open data, and can be accessed from our repository on GitHub.
If you create data visualisations or other interesting results please consider adding them to our collection or sharing them with us.